Laserfiche Snapshot runs like a printer, so the setting can be found in the printer configuration.
Here's the steps I took in Windows 11 - it's be slightly different in earlier versions of Windows, but should be somewhat similar.
- Start Menu > Search for Printers > Open "Printers and Scanners".
- Select "Laserfiche Snapshot" from the list of printers.
- Open "Printing Preferences".
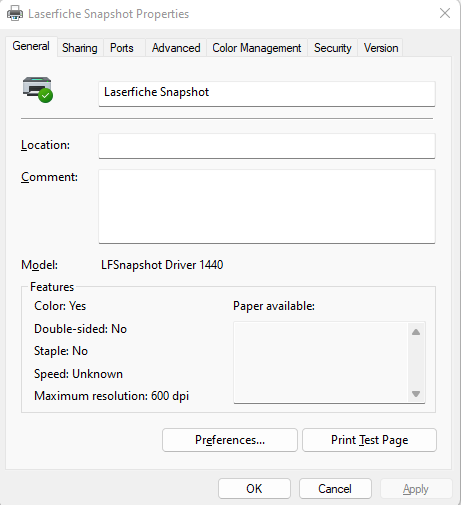
- Should look something like this:

- Click the "Preferences" button.
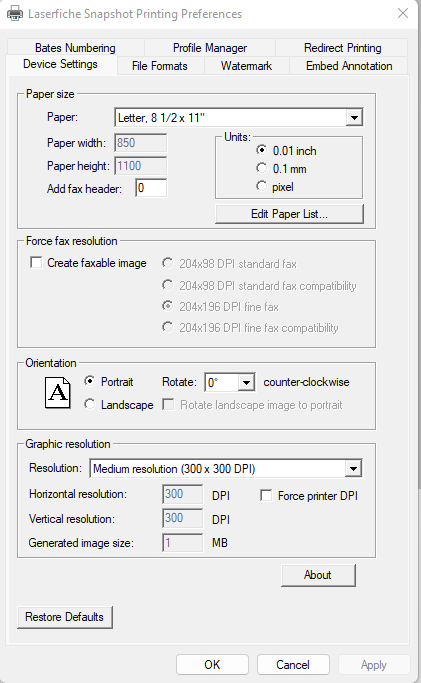
- Should look something like this:

- Go to the "File Formats" tab.
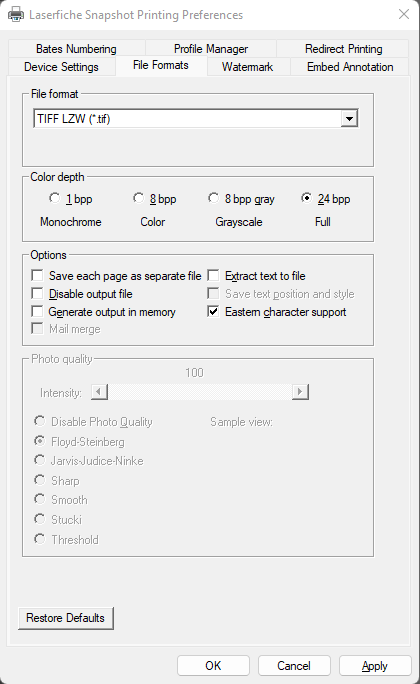
- The "File Format" will need to be "JPEG (*.jpg)", "TIFF JPG (*.tif)", or "TIFF LZW (*.tif)" in order to select full "Color Depth".
- It looks something like this:

- Click "OK".
- Click "OK".
- This should now be saved as the default preference for this user on this workstation to print to Snapshot in color.
Note that you can also get into and change these "File Format" and "Color Profile" settings while you are printing to Snapshot.
Hope that helps!