I've been looking through your code and I'm struggling to follow much of it.
Maybe this will be helpful to you. Here's some code I put together for handling a count-down timer on a test form.
This is very similar to the structure I laid out for this post: https://answers.laserfiche.com/questions/112149/How-To-Create-a-Circular-Graphic-Percent-Complete-Indicator#112150
Here's the two images used. You can store the images on your form server at: C:\Program Files\Laserfiche\Laserfiche Forms\Forms\img and then easily access them via URL.


Add an HTML element to your form. Give it CSS Class Name of StartTimerButton. Give it this HTML:
<button type="button" id="StartTimerButton">Start Count Down Timer</button>
Add an HTML element to your form. Give it CSS Class Name of countDownTimer. Give it this HTML (updating your server name in 2 places):
<!-- multiple copies of "Custom HTML" fields can be used with this HTML code, just ensure they each have a different CSS Class value in order to refer to them separately in your Javascript. -->

<!-- This div is used for the header text - change its width by setting the max-width value in the div tag (match to the image width) and change the text size by changing the header tag, h1, h2, h3, h4, h5, etc. -->

<div style="max-width:100px;">
<h4 class="header_text" style="text-align:center;">Countdown Timer</h4>
</div>

<!-- These divs, which include the container class, the back class, and the front class are for holding the progress indicator image.  The back classes' image is the image being changed from and the front classes' image is the image being changed to.  Select different images by entering different URLs in the src component of the img elements.  Change the image sized by changing the width and height components of the img elements.  Suggestions include using a "blank" (completely transparent) image for the back class, or using the same image that is in the front class, but with washed out colors. -->

<div class="container_class">
   <div class="back">
      <img src="http://YourServerNameGoesHere/forms/img/custom/blank.png" style="width:100px; height:100px;position:absolute;">
   </div>
   <div class="front">
      <img src="http://YourServerNameGoesHere/forms/img/custom/timer.png" style="width:100px; height:100px;">
   </div>
</div>

<!-- This div is used for the footer text - change its width by setting the max-width value in the div tag (match to the image width) and change the text size by changing the tag, h1, h2, h3, h4, h5, etc.  The text withing the tagname element with percentValue class will be auto-updated by the code to match the numerical percent completed. -->

<div style="max-width:100px;">
<h6 class="footer_text" style="text-align:center;"><tagname class="minutesValue">0</tagname> Minutes<br><tagname class="secondsValue">0</tagname> Seconds<br>Remaining</h6>
</div>
Add several example test question fields to your form.
Add this CSS to your form:
/*List the CSS Classes of All of the "Progress Indicator" Custom HTML elements here, each
one separated by a comma.  Also set the max-width to 20 pixels more than the image width.
Setting the display value to inline-block allows them to be shown side-by-side.  Setting
the max-width value keeps it from using up the entire width of the window.*/
.countDownTimer {
  max-width: 120px;
  display: inline-block;
}
Add this Javascript to your form:
//this function is automatically called as soon as the form window finished loading.
$(document).ready(function () {

  //maximum minutes for the count down
  var minutes = 15;

  //initially hide the countDownTimer and Submit button
  $('.countDownTimer').hide();
  $('.Submit').hide();

  //initially make all fields readonly
  $('input').each(function() {
    $(this).attr('readonly', 'true');
    $(this).attr('disabled', 'true');
    $(this).addClass('disabled');
  });
  $('textarea').each(function() {
    $(this).attr('readonly', 'true');
    $(this).addClass('disabled');
  });
  $('select').each(function() {
    $(this).attr('readonly', 'true');
    $(this).addClass('disabled');
  });

  //when the start button is clicked, hide the button and start the countdown timer.
  //also make the fields editable
  $('#StartTimerButton').click(function(){
    $('.StartTimerButton').hide();
    $('.countDownTimer').show();
    $('input').each(function() {
      $(this).removeAttr('readonly');
      $(this).removeAttr('disabled');
      $(this).removeClass('disabled');
    });
    $('textarea').each(function() {
      $(this).removeAttr('readonly');
      $(this).removeClass('disabled');
    });
    $('select').each(function() {
      $(this).removeAttr('readonly');
      $(this).removeClass('disabled');
    });
    //This loop will repeatedly call the drawStatus function to update the countdown timer.
    for (i = 0; i <= (minutes * 60); i++) {
      //setting the function call into a variable makes it easier to call with the setTimeout function.
      //the two parameters included in the drawStatus call are the name of the CSS Class of the
      //selected progress indicator and the seconds remaining that you'd like to have displayed.
      var function1 = 'drawStatus("countDownTimer", ' + ((minutes * 60)-i) + ',' + (minutes * 60) + ')';
      setTimeout(Function(function1), i*1000);
    }  // end of for loop
  });  //end of $('#StartTimer').click(function(){

});  // end of $(document).ready(function ()

function drawStatus(className, secondsRemaining, secondsTotal){

  //this function is called to update the completion of the progress indicator

  //calculate the percentComplete value
  var percentComplete = secondsRemaining / secondsTotal * 100;

  //calculate the minutes and seconds remaining
  var minutesLeft = Math.floor(secondsRemaining/60);
  var secondsLeft = secondsRemaining % 60;

  //round off to 1 decimal place.
  percentComplete = percentComplete.toFixed(1);

  //percentages below 0 are displayed as 0 and above 100 are displayed as 100.
  //note that percentages between 0 and 100 will have 1 decimal place, but 0 and 100
  //will be displayed without a decimal.
  if (percentComplete <= 0) {
    percentComplete = 0;
  }
  else if (percentComplete >= 100) {
    percentComplete = 100;
  }

  //update the pecent complete value in the footer text of the progress indicator
  $('.' + className + ' > .cf-custom > div > .footer_text > .minutesValue').text(minutesLeft);
  $('.' + className + ' > .cf-custom > div > .footer_text > .secondsValue').text(secondsLeft);

  //When the timer runs out make all fields readonly and show the submit button
  if (minutesLeft == 0 && secondsLeft == 0) {
    $('input').each(function() {
      $(this).attr('readonly', 'true');
      $(this).attr('disabled', 'true');
      $(this).addClass('disabled');
    });
    $('textarea').each(function() {
      $(this).attr('readonly', 'true');
      $(this).addClass('disabled');
    });
    $('select').each(function() {
      $(this).attr('readonly', 'true');
      $(this).addClass('disabled');
    });
    $('.Submit').show();
    $('.Submit').removeAttr('readonly');
    $('.Submit').removeAttr('disabled');
    $('.Submit').removeClass('disabled');
    $('.countDownTimer').hide();
  }

  //calculate the x and y coordinates of the circle eminating out from the center of the image.
  //step 1-convert percent complete (0-100) to an angle (0-360).
  //step 2-determine the x and y coordinates around the edge of the cirlce.  This includes:
  //       removing 90 degrees from the angle (cause it to start at top instead of right.
  //       converting the angle in degrees to angle in radian
  //       determining the cosine (x coordinate) and sine (y coordinate) of the circle edge.
  //       the radius of the circle is used as 100% of the image width/height - despite the
  //          fact that the image center is at 50%, 50% - this is so that the point on the
  //          circle edge will extend beyond the borders of the image square, instead of
  //          touching the edges 15 0%, 25%, 50%, 75%, and 100%, and falling short otherwise.
  //       finally, we add 50 to each value, to get the circle midpoint at 50%, 50% instead of
  //       at 0%, 0%.
  //step 3-we round off the coordinate values to 1 decimal place, for cleanliness.
  var angleComplete = percentComplete * 3.6;
  var coordinateX = 50 + (100 * Math.cos((angleComplete - 90) / 180 * Math.PI));
  var coordinateY = 50 + (100 * Math.sin((angleComplete - 90) / 180 * Math.PI));
  coordinateX = coordinateX.toFixed(1);
  coordinateY = coordinateY.toFixed(1);

  //these if...if else... statements will create the clipping path to display the percent complete
  //only the part of the "front" image that is inside the path will be displayed.
  //the clip-path polygon code can include up to seven end-points.  They always have at least
  //three, the image center, the image top-center (0% point) and the calculated point for the percent
  //complete angle, moving around the image.  As each corner of the image is passed by, another
  //point is dropped and left in that corner.
  //each section of the if...if else... statement has two clip-path values, one for clip-path
  //and the other for -webkit-clip-path.  The two commands are to try to make it compatible
  //with more browsers and in most cases are just redundant
  if (percentComplete <= 12.5) { //top-center to top-right corner (0-45 degrees or 0%-12.5%)
    $('.' + className + ' > .cf-custom > .container_class > .front').css('-webkit-clip-path', 'polygon(50% 50%, 50% 0%, ' + coordinateX + '% ' + coordinateY + '%)');
    $('.' + className + ' > .cf-custom > .container_class > .front').css('clip-path', 'polygon(50% 50%, 50% 0%, ' + coordinateX + '% ' + coordinateY + '%)');
  }
  else if (percentComplete <= 37.5) { //top-right corner to bottom-right corner (46-135 degrees or 12.6%-37.5%)
    $('.' + className + ' > .cf-custom > .container_class > .front').css('-webkit-clip-path', 'polygon(50% 50%, 50% 0%, 100% 0%, ' + coordinateX + '% ' + coordinateY + '%)');
    $('.' + className + ' > .cf-custom > .container_class > .front').css('clip-path', 'polygon(50% 50%, 50% 0%, 100% 0%, ' + coordinateX + '% ' + coordinateY + '%)');
  }
  else if (percentComplete <= 62.5) { //bottom-right corner to bottom-left corner (136-225 degrees or 37.6%-62.5%)
    $('.' + className + ' > .cf-custom > .container_class > .front').css('-webkit-clip-path', 'polygon(50% 50%, 50% 0%, 100% 0%, 100% 100%, ' + coordinateX + '% ' + coordinateY + '%)');
    $('.' + className + ' > .cf-custom > .container_class > .front').css('clip-path', 'polygon(50% 50%, 50% 0%, 100% 0%, 100% 100%, ' + coordinateX + '% ' + coordinateY + '%)');
  }
  else if (percentComplete <= 87.5) { //bottom-left corner to top-left corner (226-315 degrees or 62.6%-87.5%)
    $('.' + className + ' > .cf-custom > .container_class > .front').css('-webkit-clip-path', 'polygon(50% 50%, 50% 0%, 100% 0%, 100% 100%, 0% 100%, ' + coordinateX + '% ' + coordinateY + '%)');
    $('.' + className + ' > .cf-custom > .container_class > .front').css('clip-path', 'polygon(50% 50%, 50% 0%, 100% 0%, 100% 100%, 0% 100%, ' + coordinateX + '% ' + coordinateY + '%)');
  }
  else if (percentComplete <= 100) { //top-left corner to top-center (316-360 degrees or 87.6%-100.0%)
    $('.' + className + ' > .cf-custom > .container_class > .front').css('-webkit-clip-path', 'polygon(50% 50%, 50% 0%, 100% 0%, 100% 100%, 0% 100%, 0% 0%, ' + coordinateX + '% ' + coordinateY + '%)');
    $('.' + className + ' > .cf-custom > .container_class > .front').css('clip-path', 'polygon(50% 50%, 50% 0%, 100% 0%, 100% 100%, 0% 100%, 0% 0%, ' + coordinateX + '% ' + coordinateY + '%)');
  } // end of if (percentComplete <= 12.5) ... else if ... statements

} // end of function drawStatus(className, percentComplete)
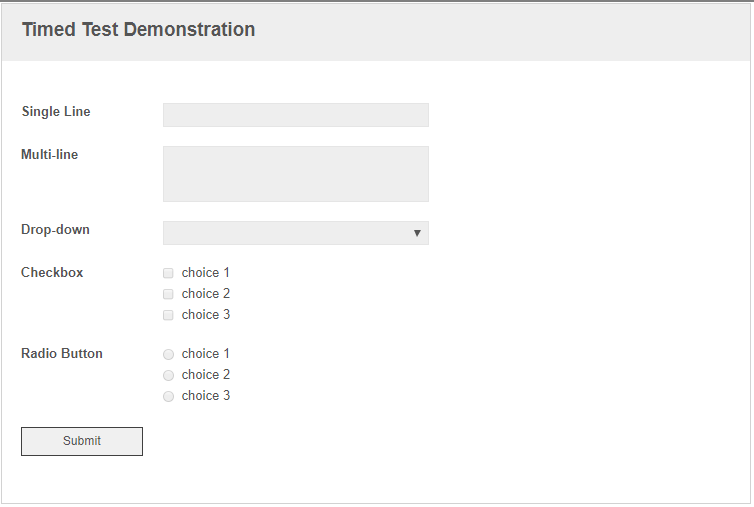
When the form initially loads, it'll look like this, with your test questions being read only:

After clicking the "Start Count Down Timer" button, you'll see a count down timer and be able to edit the fields.
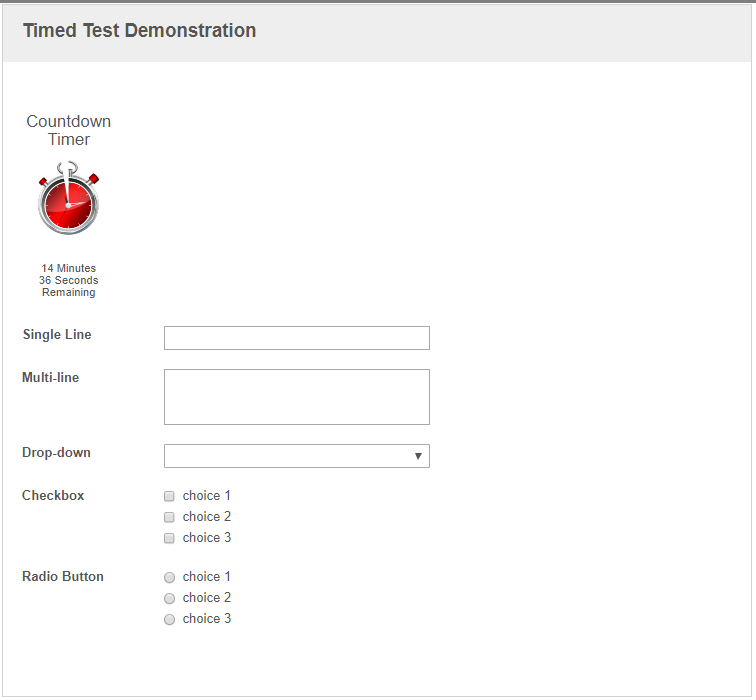
Once the timer is up, the fields will become readonly and the submit field will reappear.