Hello Sahil,
The following is some script I think might help you get started in creating the correct formatting for your html activity with a table.
$(document).ready(function(){
$('#q1').change(function(){ //#q1 is the drop down that selects how many rows
var rownumber = $('#q1 select').val(); //same #q1 as above
$('.form-del-field').trigger('click');
for (i=0; i<rownumber; i++){
$('#q4').trigger('click'); //#q4 is the cf-table-add-row button
}
});
$('#q5, .form-del-field').on('change click',function(){ //q5 is your table
var html = '';
var col1 = '[id^=Field2\\(]'; //selectors for each column, '#q2' goes to '[id^=Field2\\(]'
var col2 = '[id^=Field3\\(]';
var col3 = '[id^=Field6\\(]';
$(col1).each(function(){
var index = $(col1).index(this);
if ($(col1).eq(index).val() != '' &&
$(col2).eq(index).val() != '' &&
$(col3).eq(index).val() != '')
{
html += $(col1).eq(index).val()+' is big, '
+$(col2).eq(index).val()+' is cool, and '
+$(col3).eq(index).val()+' is very cool!\n';
}
});
$('#q7 textarea').val(html); //#q7 is the multiline field
});
});
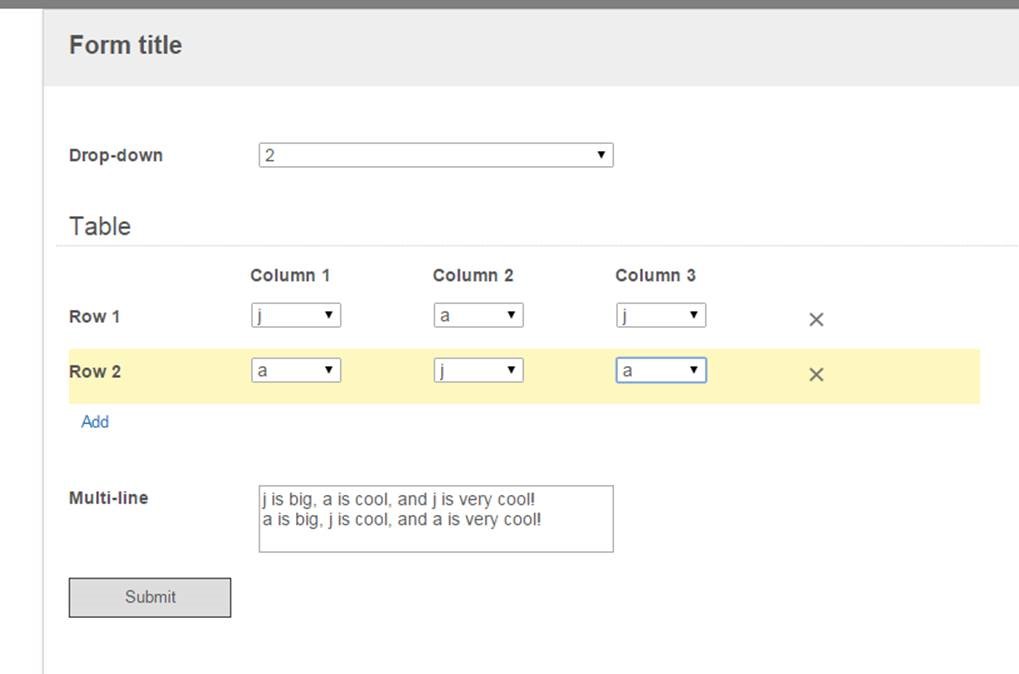
The first part of this script will allow a drop down field to interact with the add and delete buttons on a table field, enabling you to trigger the creation and deletion of rows in a table dynamically with a drop down list.
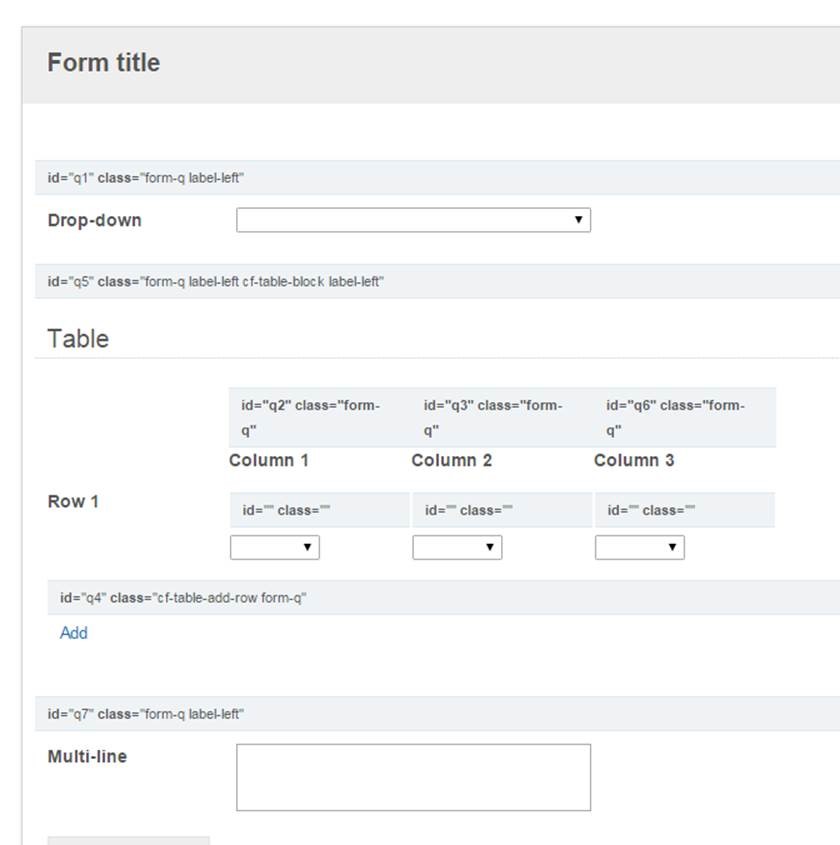
The second part of the code indexes each row in your table which allows you to add text in-between and show the table values horizontally rather than vertically. The in-between text in this case is “is big” “is cool” and “is very cool” provided are also screenshots of the fields I used and how this code will affect the form.
I printed this text into a multi-line field so it can be passed to an email activity as a token, you can also modify the code to embed into an html and that will show in the custom html field; however, the html field cannot be passed to an email activity.
I hope this helps you get started and I wish you the best of luck.