Workflow does not do any image processing out of the box. If you need the process to be fully automated, you can do it with Quick Fields Agent. Essentially, Workflow can place all documents that are ready for archival in a folder. Quick Fields can then take them from that folder on a regular basis (which can be scheduled with the Agent module), convert them to black and white and then place them in their final destination.
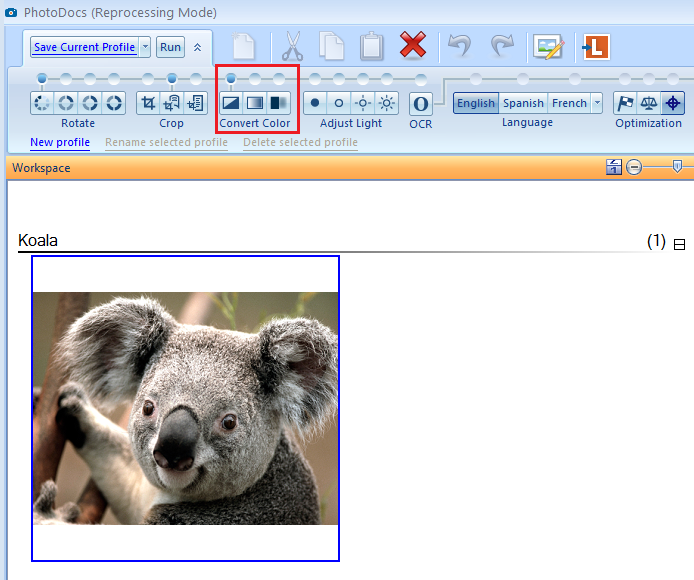
If you don't have Quick Fields, then you can also do this color conversion manually using Photodocs. You should begin by creating a copy of the color document. Then, if you right-click the copy, one of the options will be "Reprocess with Photodocs." This assumes Photodocs is installed on your computer. Once the document opens, you can run color conversion processes on them.
See below for an example. I have a picture of a Koala in the repository that I opened in Photodocs. One of the options in the toolbar is color conversion, which comes with three options. The one I have selected converts the page to black and white when clicked.
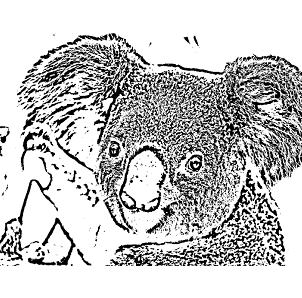
Once color conversion is done, you can click Store on the bottom right corner, and copy the document (now black and white) to the folder you want. Here's what my koala looks like now:
Photodocs is nice because it also gives you the ability to select multiple processes (such as cropping), saving them as a profile and running them on groups of documents. So you can perform these types of operations in batches once per day or even once per week. It still has to be done manually but this can save you a few steps.