Here’s a guide on how to setup this integration using LF’s new External client app Integration type. This is a quick and dirty setup, and it assumes you’re using a Salesforce Developer account, but if you are using a full Salesforce account it will still work and the URL will look less weird.
If you want a Salesforce Developer account, signup for Salesforce Trailhead (it’s free), and then use the courses below to create a “scratch org” for development/demo/testing purposes (please read the Ts and Cs, I’m not your lawyer).
https://trailhead.salesforce.com/content/learn/projects/quick-start-lightning-web-components/set-up-visual-studio-code
https://trailhead.salesforce.com/content/learn/projects/quick-start-salesforce-dx/create-and-test-our-scratch-org
Once you have completed your scratch org setup (or logged into your regular org), you first need to create a user that will be used for the Client Credentials flow. Find the Users page under Administration > Users > click “New User”
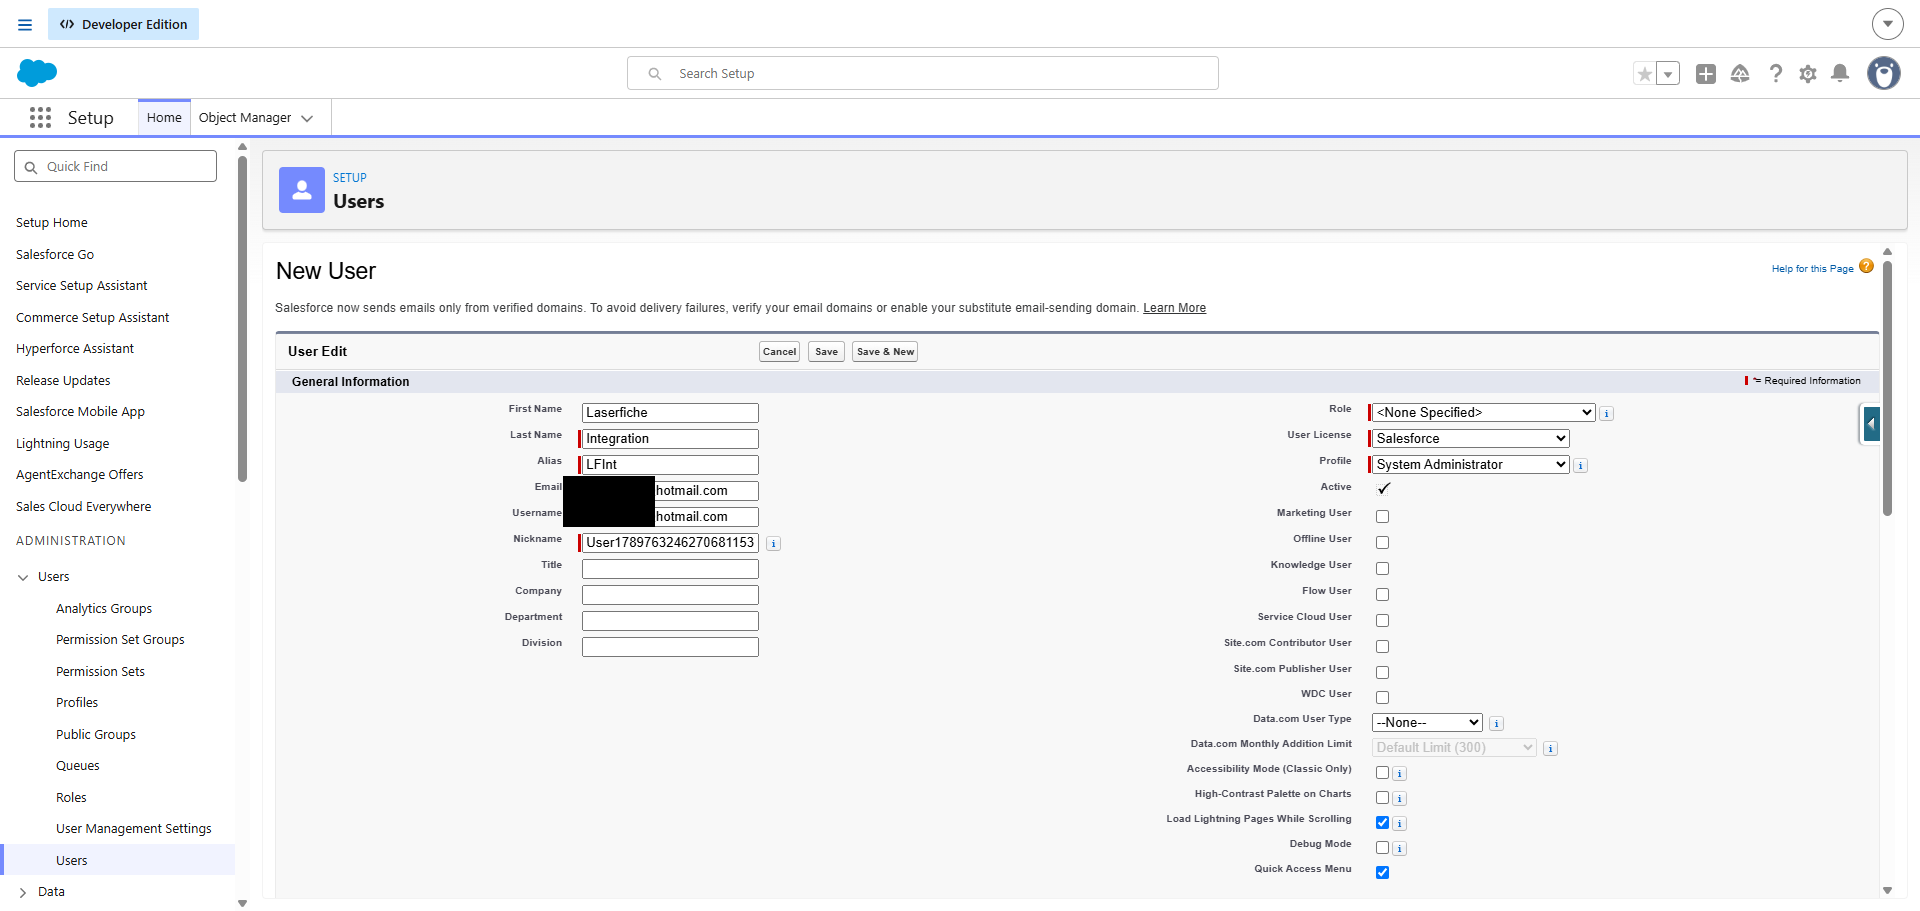
You can use whatever email you like, but it needs to be valid, because you will need to verify it later. In Salesforce, you cannot delete users, and you cannot change user emails addresses in scratch orgs, so if you plan to use this email as an actual person later, use a different email! Note that I have set the User License as “Salesforce” and the Profile as “System Administrator” – you should not do this is a real system. Use least privilege! A better option would be selecting “Salesforce Integration” with “Minimum Access - API Only Integrations”, as this requires administrators to explicitly grant object/field permissions via targeted permission sets and the Salesforce API Integration permission set license -- you can always change these settings later to tighten up security but for now I’m setting this user as an admin.
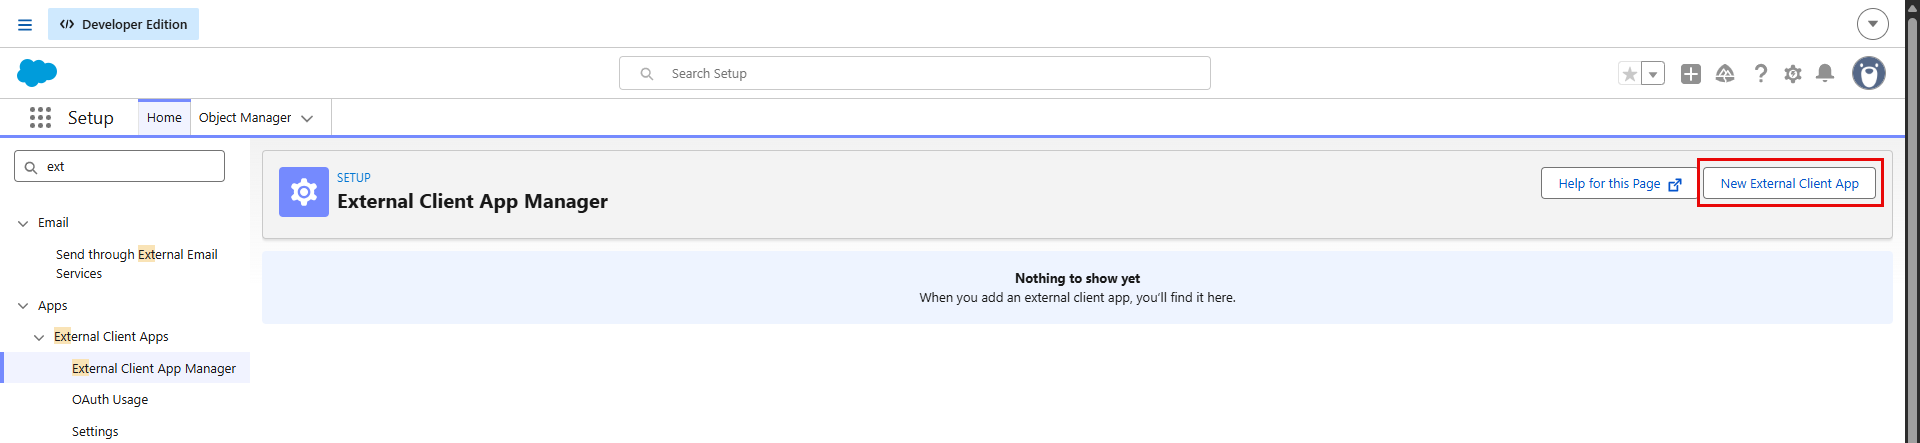
Once you create the user, go ahead and click the verify option and complete those steps in your other email account. After that, it’s time to create the integration – head over to External Client App Manager and click “New External Client App”
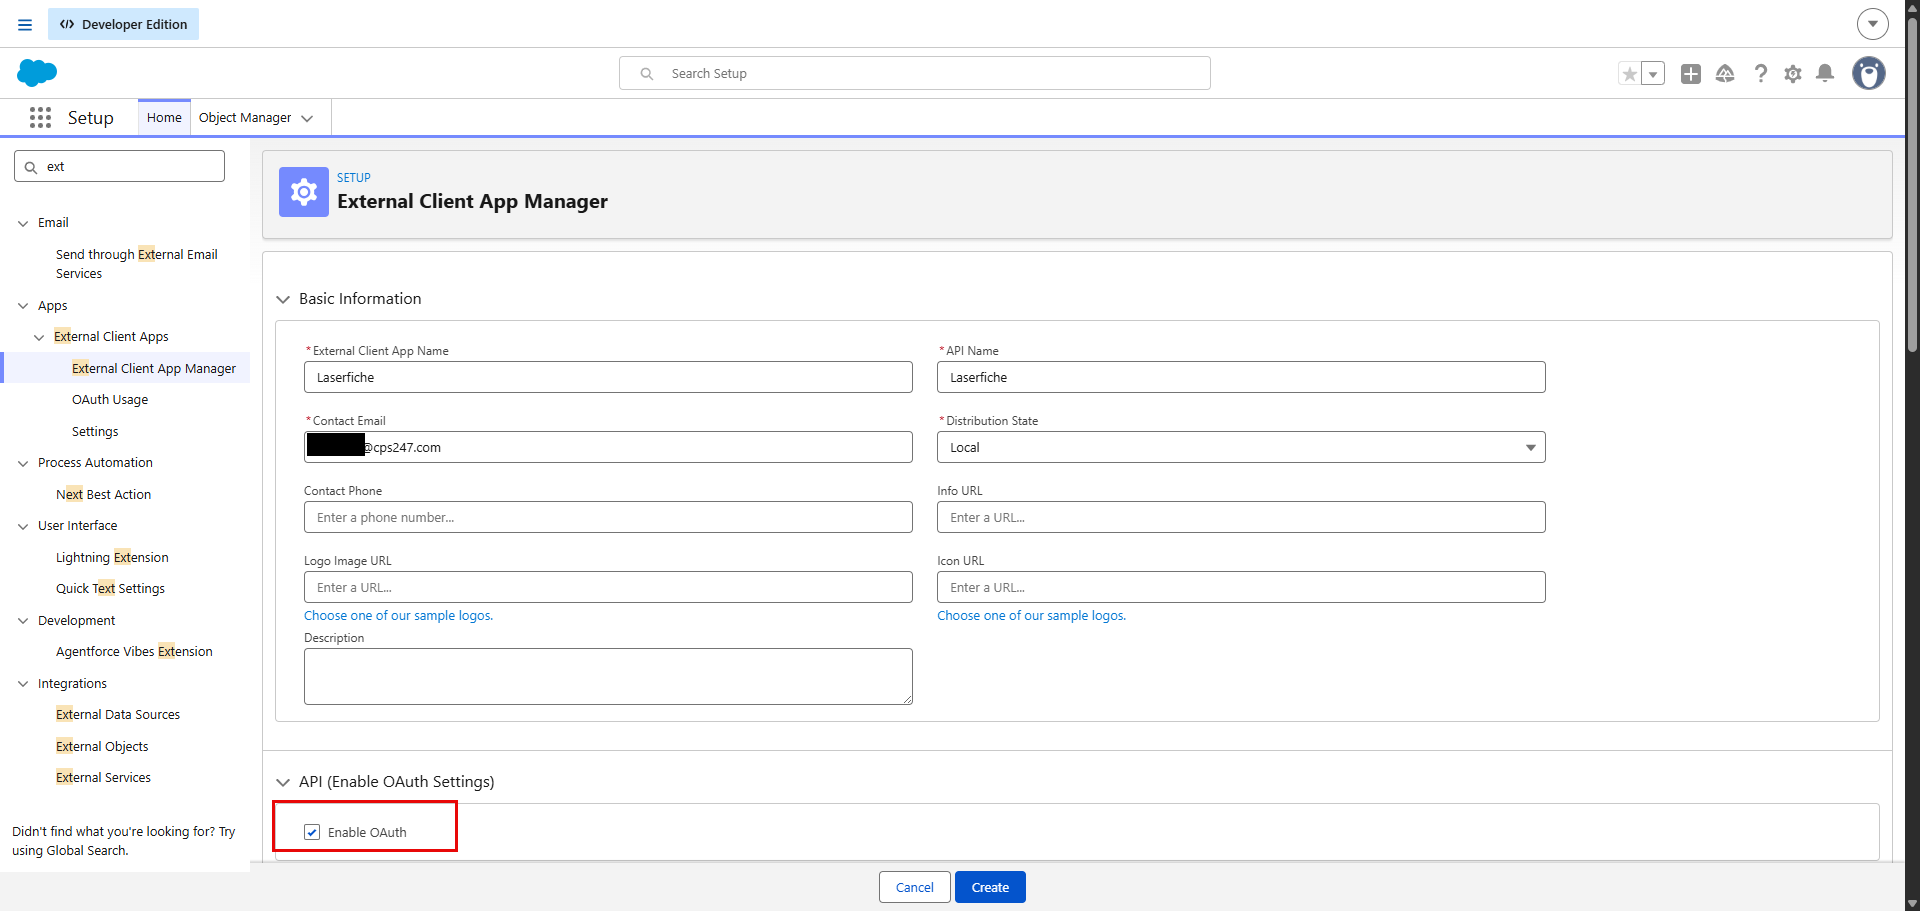
Fill in the needed fields as you like (contact email should be your own email address, not your integration user), and enable OAuth:
Laserfiche does not care what the Callback URL is, so just put any valid URL in that field. For OAuth Scopes, you need either Full access (full) or Access and manage your data (api). Again, please choose least privilege in a real system.
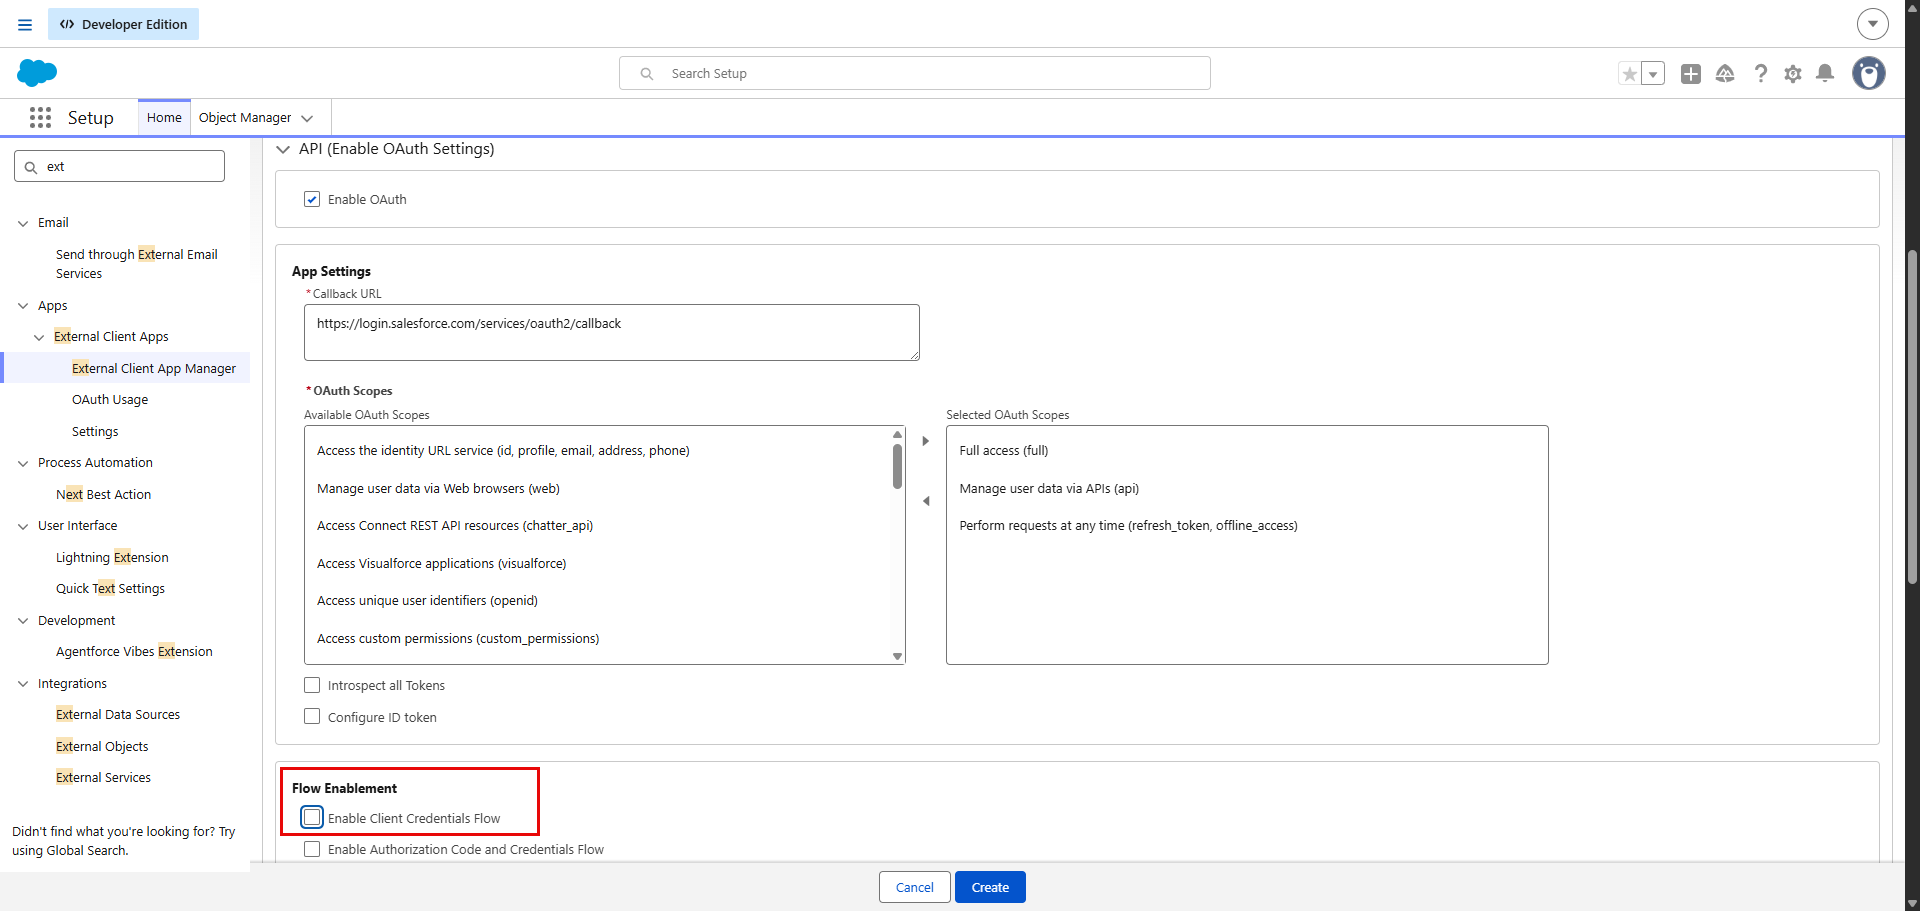
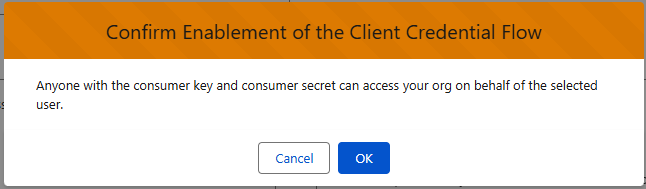
You must also Enable Client Credentials Flow – you will get a notification when doing so: click OK
Click Create!
Now, go and click Edit again on the same page, as it’s time to add the user that this app will run as:
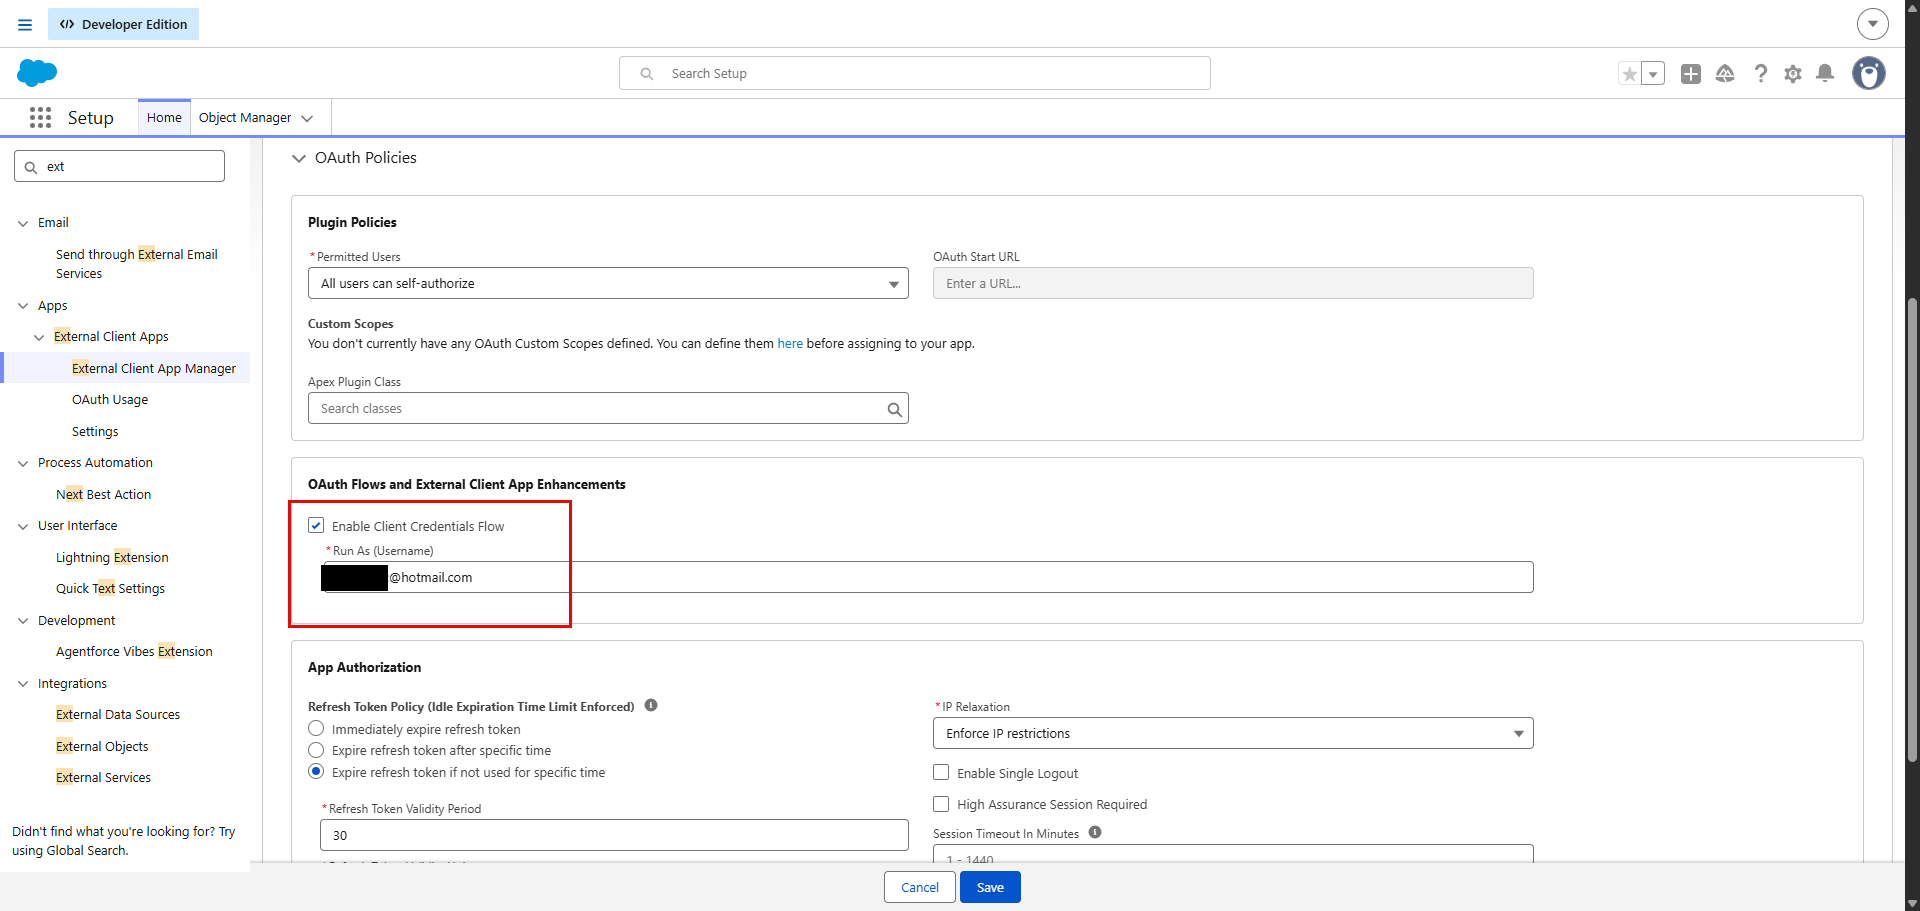
Use the email address for your integration user you created at the start, then click Save.
Once the page reloads, select the Settings Tab and click the button to access the Consumer Key and Secret. You need these for the Laserfiche side.
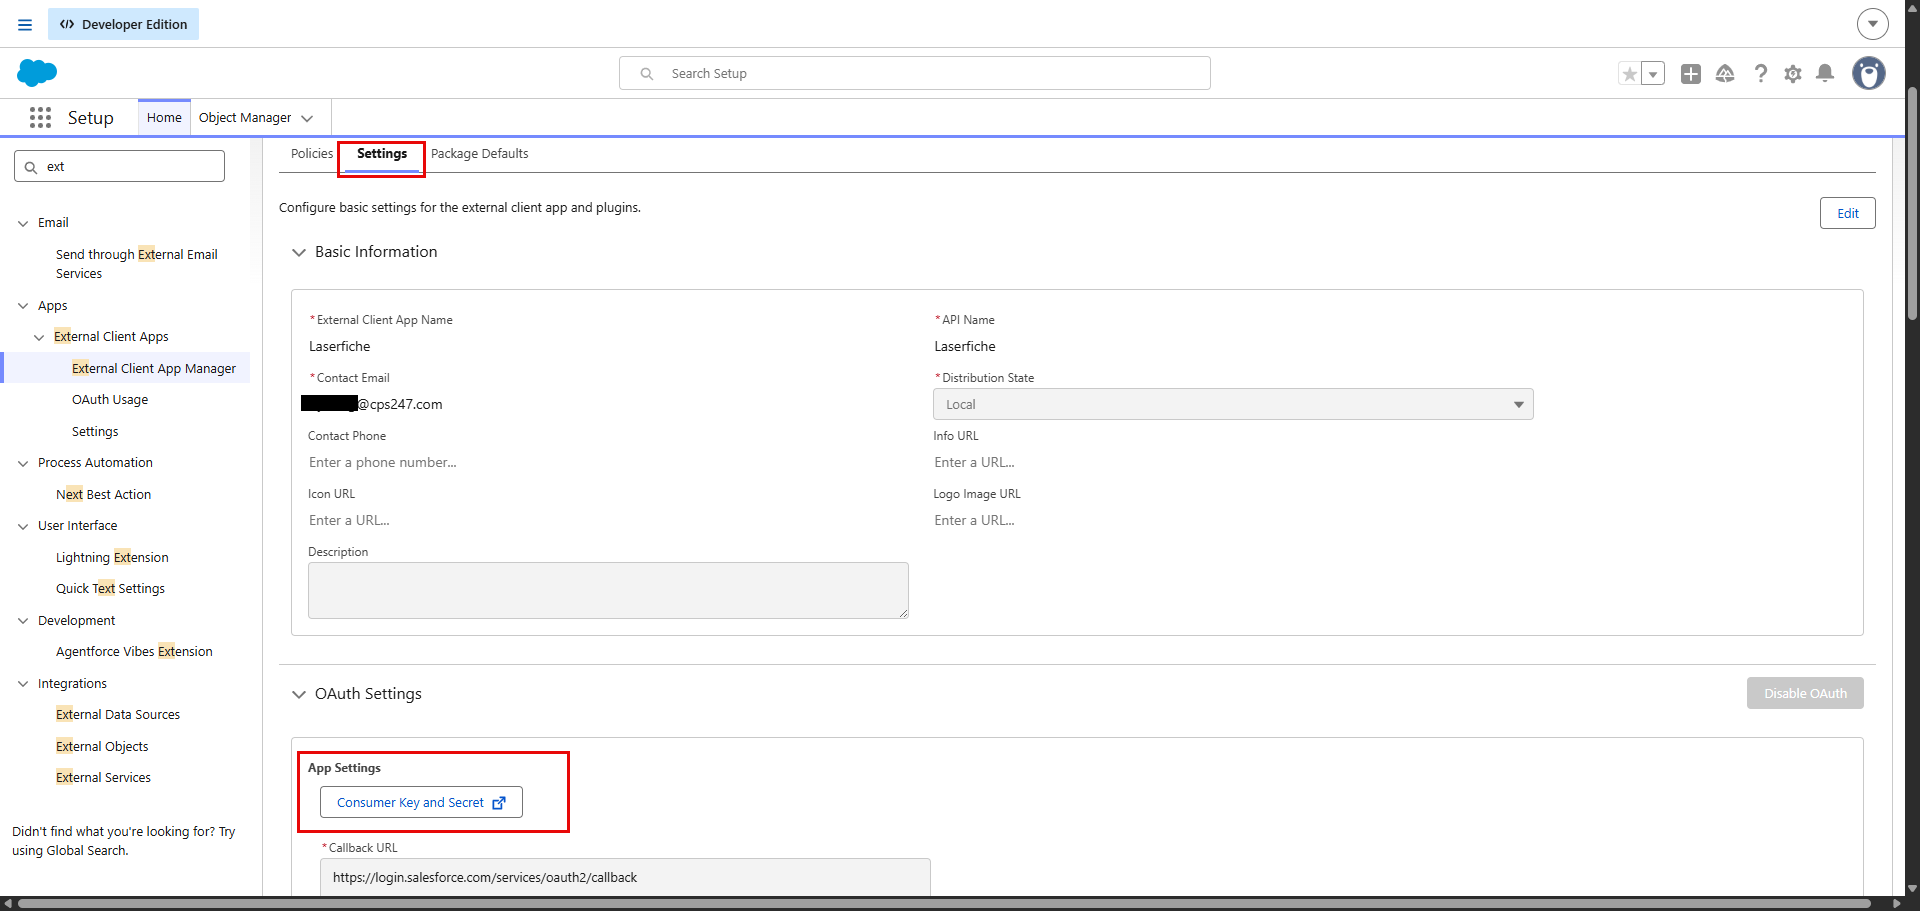
A new window will open, and you will need to verify your account with a one-time email code. Do so. After you do so, you will be taken to the Salesforce Classic page where you can copy the Key and Secret – store securely!

You now have everything you need to setup the Laserfiche side. Head over to Integrations and create a Salesforce Application integration using the External Client App option.
If you are using a real org, the URL will be https://[YourOrgDomainName].my.salesforce.com
If you are using Developer Edition, your URL will be like https://random-random-random-dev-ed.trailblaze.my.salesforce.com
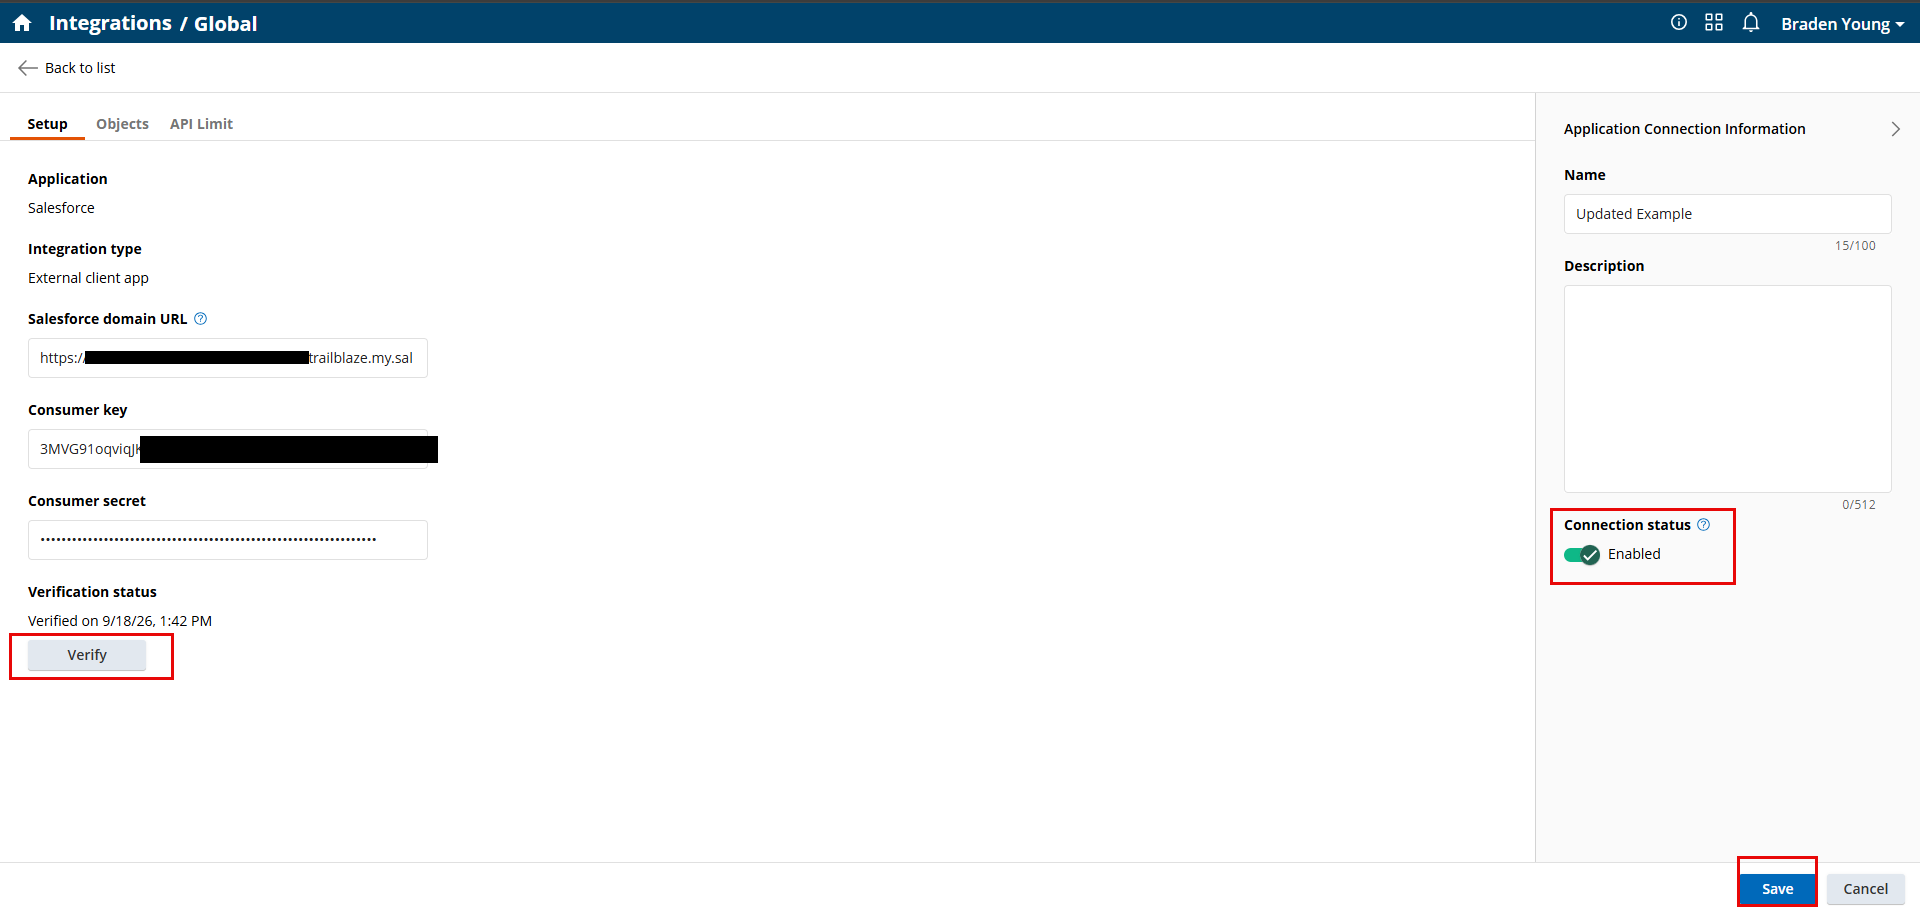
Paste Key/Secret from earlier, Verify, and Enable, and Save!
You should now be able to add the Salesforce Objects you want to integrate with on the Objects tab 😊