This looked like a really fun challenge, and I wanted to see what (if anything) I could do to make it work. And I've got something working!
This is a round-about way to handle it, because it creates two versions of the image (one on the form itself, and one hidden in the iFrame where the Javascript is running), but it appears to work in my testing. This is on Version 11.0.2311.50553.
Preparation work:
- Determine the exact width and height of the original image (reduce your image size if it is too big for use on your Form - I tested this with an image that was 500 x 500 and it worked well). You want your original image to be the size you are actually using on the form, it'll go kind of weird if the Javascript later is using a different size than the original image.
- Convert your image to base64. Just Google "convert image to base64" and you should find several sites that can do it. Save that base64 code to a text editor for use later in your form.
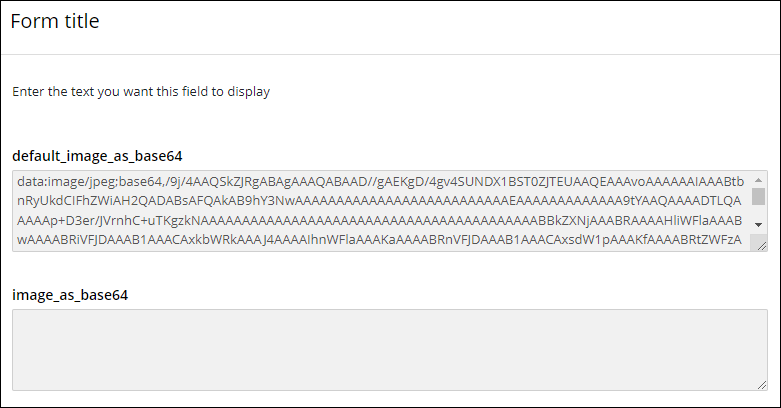
On your form, you are going to add three elements:
- Custom HTML element. Don't worry about the content as it'll be changed later. Give it a class name of canvasContainer.
- Multi-Line field with variable name of default_image_as_base64. For the default value on this field, enter the base64 code of your image that you got before and saved to a text editor.
- Multi-Line field with variable name of image_as_base64. Leave the default value on this one blank.
It should look something like this:
Add field rules to hide the two multi-line fields. Make sure you set it to save their values.

Finally, add this Javascript to your form, making sure to list the width and height of your image that you determined at the beginning in lines 4 and 5.
//These are variables used throughout the process.
//The width and height must be an exact match for the original image
//or it will behave in an unexpected manner.
var imgWidth = 500;
var imgHeight = 500;
var initialImage = LFForm.getFieldValues( {variableName: "image_as_base64"} );

//Function to load the default image into the current image field.
async function CopyDefaultImage() {
  var defaultImage = await LFForm.getFieldValues( {variableName: "default_image_as_base64"} );
  await LFForm.setFieldValues({variableName: "image_as_base64"}, defaultImage);
  await CreateAndLoadVisibleCanvasAndImage();
  initialImage = await LFForm.getFieldValues( {variableName: "image_as_base64"} );
  await LoadImageToHiddenCanvas();
}

//Function to create and display the image and canvas that are visible on screen.
//These cannot be modified directly by the code, but are helpful for tracking,
//and handling the user interaction clicking on the image.
async function CreateAndLoadVisibleCanvasAndImage() {
  var currentImage = LFForm.getFieldValues( {variableName: "image_as_base64"} );
  var customHTMLField = LFForm.findFieldsByClassName("canvasContainer")[0];
  var newContent = '<div style="display: grid;">';
  newContent = newContent + '<img width="' + imgWidth + '" height="' + imgHeight + '" style="grid-column: 1; grid-row: 1;" src="' + currentImage + '">';
  newContent = newContent + '<canvas width="' + imgWidth + '" height="' + imgHeight + '" style="border:black 2px solid; grid-column: 1; grid-row: 1;" onclick="canvasClick(event)"></canvas>';
  newContent = newContent + '</div><br><button onclick="resetClick(event)">Reset/Clear the Image</button>';
  await LFForm.changeFieldSettings( customHTMLField, {content: newContent} );
}

//When the form is loaded on screen, call the CopyDefaultImage() function and
//the CreateAndLoadVisibleCanvasAndImage() function as needed.
//Then load the image for the hidden canvas.
var formLoadTasks = async function() {
  if (initialImage == '') {
    await CopyDefaultImage();
  }
  else {
    await CreateAndLoadVisibleCanvasAndImage();
  }
  await LoadImageToHiddenCanvas();
}
formLoadTasks();

//Variables and function to handle a second canvas that is not visible on screen.
//This canvas is used for the actual modifications of the image.  That is because
//the code can modify this element, but not the visible element on screen.
const hiddenCanvas = document.createElement('canvas');
const ctx = hiddenCanvas.getContext('2d');
const hiddenImage = new Image();
async function LoadImageToHiddenCanvas() {
  hiddenImage.crossOrigin = "";
  hiddenImage.src = initialImage;
  hiddenImage.onload = () => {
    hiddenCanvas.width = imgWidth;
    hiddenCanvas.height = imgHeight;
    ctx.drawImage(hiddenImage, 0, 0);
  };
  document.body.appendChild(hiddenCanvas);
}

//When the user clicks on the visible canvas, record the X and Y positions
//from the click and then edit the hidden canvas at those coordinates.
//Then save the edited image and reload the visible canvas and image.
window.canvasClick = async function(event) {
  DrawXOnCanvas(event.offsetX, event.offsetY);
  await updateImage();
  await CreateAndLoadVisibleCanvasAndImage();
}

//When the user clicks the button to reset the image, it is reloaded
//from the default.
window.resetClick = async function(event) {
  await CopyDefaultImage();
}

//Function to save the hidden canvas image to the base64 field.
async function updateImage() {
  await LFForm.setFieldValues({variableName: "image_as_base64"}, hiddenCanvas.toDataURL());
}

//Function that draws an X on the Hidden Canvas.
function DrawXOnCanvas(x, y) {
  ctx.beginPath();
  ctx.moveTo(x - 10, y - 10);
  ctx.lineTo(x + 10, y + 10);
  ctx.stroke();
  ctx.moveTo(x + 10, y - 10);
  ctx.lineTo(x - 10, y + 10);
  ctx.stroke();
}
And that should be it. This worked for me on testing both with the initial form loading, but also on subsequent user tasks, including a read-only user task (which should be an indication that it will save the image to the repository, but I didn't specifically test that).
Good luck!